오늘 한 일
React.js 기본적인 사용법을 숙지했고,
Component들이Data를props로 주고 받는지 알게 되었고,
Component를 어떤 상황에서 Functional 하게 만들지, Classical 하게 만들지 알게 되었다.아직 Life Cycle 부분은 더 봐야 겠지만 , 좀 더 큰 프로젝트에서 알게 된다니 개념만 정리해놓고 가야겠다.
Props
==Component가 Data를 주고 받을 때 사용한다.==
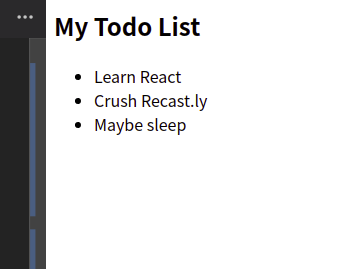
예를 들어, App이라는 가장 상위 컴포넌트가 있다고 하면 하위 Component들에게 Data를 넘겨야 한다고 가정해보자.
const  App  = () => (
	<div>
		<h2>My Todo List</h2>
		<TodoList todos={[
			'Learn React',
			'Crush Recast.ly',
			'Maybe sleep'
			]}
		/>
	</div>
);

const  TodoList  = (props) => (
	<ul>
		<li>{props.todos[1]}</li>
		<li>{props.todos[2]}</li>
		<li>{props.todos[3]}</li>
	</ul>
);

ReactDOM.render(<App  />, document.getElementById('root'));
State
==현재 페이지에서 어떤 행동에 따른 상태를 변경 하고 싶을 때 사용한다.==
예를 들어, onClick 이벤트에 따라 리스트들이 line-through 된다고 가정해보자.
const  App  = () => (
	<div>
		<h2>My Todo List</h2>
		<TodoList todos={[
			'Learn React',
			'Crush Recast.ly',
			'Maybe sleep'
			]}
		/>
	</div>
);

class TodoList extends React.Component {
	construct (props) {
		super(props);
		this.state = { done: false };
	}
	onListClick = () => {
    // 기존의 state를 this.setState을 통해 바꿀 수 있습니다.
	   this.setState({done: !this.state.done});
	}
	render () {
	    const style = {
	      textDecoration: this.state.done ? 'line-through' : 'none'
	    };

		return (
			<ul>
				<li style = {style}
					onClick = {this.onListClick}>
						{this.props.todos[1]}</li>
				<li style = {style}
					onClick = {this.onListClick}>
						{this.props.todos[2]}</li>
				<li style = {style}
					onClick = {this.onListClick}>
						{this.props.todos[3]}</li>
			</ul>
		)
	}
);

ReactDOM.render(<App  />, document.getElementById('root'));
요렇게 사용이 가능하다.
Coment
Life Cycle 은 주말에 정리하기로 하자 .
항상 주말 부채는 쌓여만 가고 부채 해결이 안되고 있는걸 보면 참 ..
답답스러운데 .. 이 놈의 몸뚱이는 어찌 잠을 쳐 자고 있는가 …